Underpainting Makeup Techniqueque
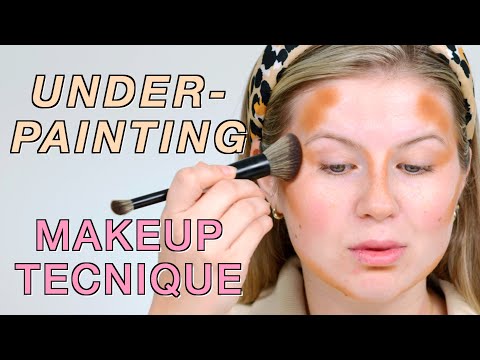
I’m gonna use the Makeup Forever, their HD palette. I like this because it has everything in here. It has my two bronzers, it has blushes, concealer colors, foundation colors, color correcting and a shimmery highlighter and these are all cream. Of course, you can do whatever you want, but this technique definitely is better if you use cream products. Let’s do it. I’m excited. So first step, cream contour or cream bronzer. I’m gonna use this color right here. Let’s use the ABH, her A30 brush. I’m gonna place my contour how Mary Phillips showed in her videos. Obviously every shape is different, I already prepped my face, also my skincare and I’m using the newest Glow Recipe, their Strawberry BHA Pore Smoothing Blur Drops. I like them so far. I’m just gonna place my contour. This is more of a bronzer, not contour. This is gonna look harsh. – [Andrey] That’s what you’re supposed to do? Make it harsh? – Harsh, yes. And then you’re gonna go in and you’re gonna blend everything together. That’s the whole beauty of this process. But instead of placing it all on my face, like my bronzer, my blush, my highlighter, concealer, I’m going to work in layers or just steps. Just working one product at a time, This way you have more control of where everything’s going to go and how it’s going to go. I’m just gonna clean up this a little bit right here. Now I’m gonna take the Makeup by Mario, the F1 brush, and flip it around to the big side and I’m just gonna start blending this into my skin. And I am gonna use a little bit of different methods of blending this, circular motions, tapping, just because I have nothing else on my skin besides my prep, like my skincare, and then the bronzer. So it’s not going to disturb anything. And I always tell this to myself, but, trust the process. Okay, we’re looking harsh, but this is a good base. Now we’re moving on to, she does step two, a highlighter in areas where you want to highlight. So this is where I would suggest something like the Elf Halo Glow Filter, or use a cream highlighter, which I’m going to use right here. Gonna take like a bigger like eyeshadow fluffy brush and work this into the brush. And this is their cream highlighter. It has a little bit of shimmer in there but it doesn’t look like heavy glitter on your skin. I’m just gonna take it where I want the highlight to pop. So bridge of my nose. A little bit right here. And Mary Phillips took a little bit of highlight right here, which I’ve never tried, but it looked interesting. I’m just gonna take some time and blend this in. Take a little bit more, kind of on the brow bone. All right, step three. Concealer time or color correcting, and then concealer, for the underpainting technique. I’m going to use this, like, salmon shade and I’m taking my Jones Road detail brush and place it right here. This is just gonna help cancel out the blue that I have going on. And I’m making sure to bring it into the inner corner as well, because I have a little bit of blue shadowing happening there. Make sure to bring it right here as well. And then I’m gonna take my Rare Beauty concealer brush and just gently tap this in. If you’re looking for a good concealer brush, Rare Beauty. It’s under $20. but in my opinion, worth every single penny. It washes well, but the best part about this brush is the density of it and it just blends everything so well, giving you that coverage without looking heavy. Even just the under eyes look really good already. And I’m gonna go with this shade right here next to the peach tone. That’s going to be my concealer. And I’m just working in layers. That’s what all the makeup artists were saying. Just work in layers, blend and continue to your next step. You have all the control and that way it looks a little more flawless Rare Beauty brush. I’m gonna blend this all together. Also, taking it down the nose a little bit to soften that contour/bronzer. Next step, foundation, and this is what’s going to soften everything This is the beauty of it all. I’m gonna take my Makeup Forever, the 152 brush, and I’m going to start using this shade right here. I’m gonna work it into the brush and then place it in areas where I need the foundation. So right here, kind of when the cheeks a little bit I’m not gonna go too high up where the concealer is just because we already concealed. And I am going gently on top of the cream bronzer. I’m gonna do just this side of the face so I can show you the difference. So you can see before, everything still looks very harsh, uneven, and then after. It’s very soft, still sculpted, chiseled out. It looks like I paid attention to detail doing this technique. I’m gonna finish this side with the underpainting makeup technique and then we’ll come back and do the blush. And then I’m gonna use a little bit of powder to set all this in place. For blush, I’m gonna take both of these shades mixed together in the same pallette and I’m gonna use my Rare Beauty blush brush. I think it’s called the Soft Pinch blush brush. It’s really stunning. It’s really great for liquid and cream formulas and it fits nicely in here as well. I’m really loading it on the brush and then just kind of go on the back of my hand to make sure it’s blended into the brush. I will say that’s the drawback of this palette. They’re a little bit smaller, the colors, so you do need more precise brushes. But the palette is stunning, especially for this type of a technique. And I’m just focusing the blush closer to my eye right here. And this way, this forces me not to use as much blush because the rest of my face is a lot softer. (chuckles) Andrey is very happy about that. I’m kidding, guys. This is a joke between us. He does not care how much blush I use or wear. I don’t do this makeup for Andrey, it’s for myself. All right, happy with that. I’m gonna just gently go over with my foundation brush with nothing on it, whatever is left on the brush and just soften, soften the edges right here. I’m gonna use the new Makeup Forever, their HD Skin Matte Velvet Powder Foundation, but I’m going to use it as a setting powder under the eyes, forehead, in areas I want to set and basically highlight but also add a little bit more coverage. But you can also use a loose setting powder, I loved, love and I still love the older original version of the Matte Velvet Skin Powder Foundation. They updated it and I think this is waterproof now and the shades are all different, but I’m using this one right here. It’s in 1R02. It’s not my my all over face color but it’s gonna be a good color to highlight and set my under eye makeup, my jaw. I’m gonna use my Rose and Ben C42 brush. Make sure to work that in. I’m just gently pressing right here. I like using a brush for powder foundations ’cause I think the overall finish is very skin-like. It doesn’t look heavy, but you still get that coverage. Oh my. Oh, that’s really pretty. And I’m kind of avoiding the cheeks a little bit, ’cause I do want that natural shine to pop and I’m not going heavy with it. Just one little tap and work it into the brush. I’m gonna finish off my eyebrows, my eye and lips and I’ll be back. Completed look with everything. All I did was used a little bit of my eyebrow pencil, the Nyx Micro Brow in shade Cool Ash Brown for my really, really petite eyeliner. Mascara, I used a little bit of Elf Lash and Roll. Phenomenal everyday mascara. So beautiful, long wearing, with a little bit of Clinique Bottom Lash on the lower like three-fourths of the outer lashes. And then I used a new lip liner by Tower 28 in shade Fill Me In. Like it actually really a lot so far. Very pigmented, very creamy, blendable. And then for the lip color from the Makeup Forever Palette, I used this more of the softer, cool pink shade in the center to blend in with the lip liner. Very similar but really pretty on top to kind of give more of a monochromatic vibe with the cheeks. Okay, so overall Andrey was asking, like, so what’s the technique? Why would you choose this technique over the traditional, you know, like the foundation, then you go with the products on top of the foundation. So how the makeup artists were explaining this, you actually use a lot less product just because you’re pinpointing those products in those specific areas. For example, the foundation, you’re only placing it in areas where you didn’t apply basically anything else. So for me, where I placed the most foundation was right here along the jaw. A little bit right here on the cheeks, like the apple of my cheeks, down the bridge of my nose, around the mouth and the center of the forehead. And then whatever was left on the brush, I went over and softened the edges of the contour, the concealer, right here around the nose and then the temple area to basically soften everything and bring it all together. And this way it really still looks like your skin. You’re using a lot less makeup than you think that you really need. And then for concealing, you only conceal the areas where you need concealer. And Mary Phillips was saying, the makeup artist, if you have any other type of blemishes on your skin that you need concealing, conceal it after you do the foundation, that way you’re only pinpointing that spot that you need to conceal and use like a really small, detail makeup brush, that way you’re only placing the concealer on top of the blemishes, and that way it’s not gonna look heavy and it’s going to wear really well throughout the day. I think this under painting makeup technique is great for honestly everybody and anybody. In reality, the skin looks so pretty and so soft and very fresh, very skin-like. And I don’t feel uncomfortable or self-conscious if somebody comes up to my face right here and they’re looking at my skin, because yes, you can see that I’m wearing makeup, but it still looks like my skin it kind of accentuates all your natural features. – [Andrey] It looks really good. – Thank you. I appreciate it. – [Andrey] I thought it was gonna be different. – Very intense? – [Andrey] Intense, yeah, or like cakey or- – Yeah. Personally, it’s really fun doing it this way because you are paying attention to detail instead of just kind of applying a lot of stuff, applying your foundation, like one or two pumps, starting with a blank canvas and then going with your other like bronzer, contour, blush, highlighter. This way you just contour, you highlight and you add color to those areas of your cheeks, your face that you need. You’re using less product than you think. And I’m glad I actually used this cause I was debating to use a lot of the other products and I think I am, well, I’m very happy that this turned out really well with the underpainting technique and then using this powder on top to set it all in place. All right, I’m gonna end it here. Thank you for watching, spending time with me and this underpainting makeup technique. I hope you guys enjoyed it, got some tips out of it and I’ll see you in the next one very soon. Bye.
